
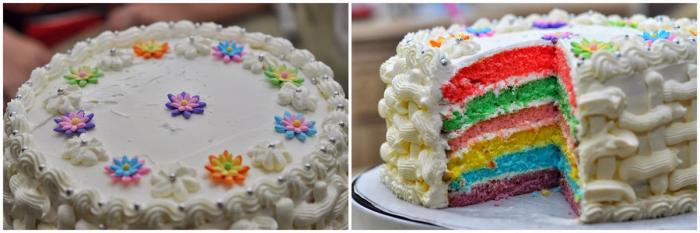
Rainbow Cake
Sign in to save recipes, rate them, and track what you've cooked.
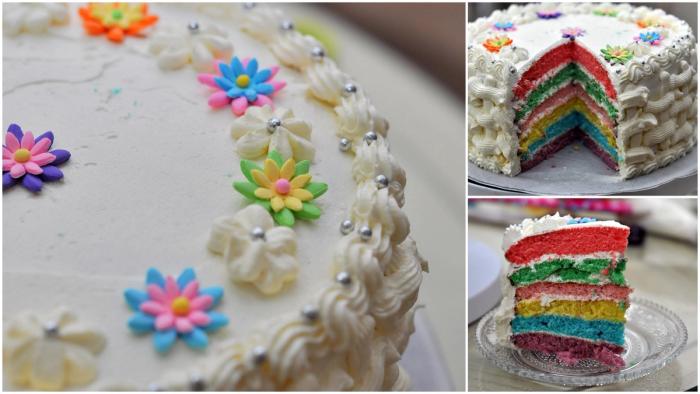
This is one of those recipes that I have thought about making but never had enough reasons to make, especially now that most of the baking tends to be much healthier than before. So when my niece was with us this week, she asked me if we could make a Rainbow cake and I was more than happy to do it! Kids these days are amazingly informed - she had seen the recipe on youtube already and was eager to try it out. Just the sheer number of colors on this cake made it inviting enough to be tried!
I also realized that my pantry is also stocked much more healthily now. I was out of the stuff that was always a given in my kitchen - shortening, enough unsalted butter, icing sugar, cake mixes, food coloring. In the previous phase, I could have rustled a cake like this at a moment's notice but now I had to make stops at at least 3 different markets to pick up everything I needed!
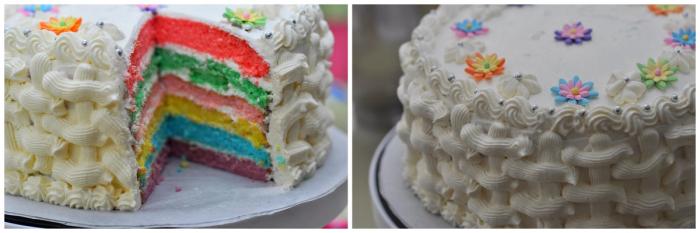
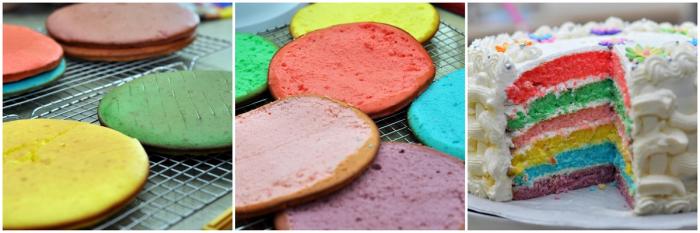
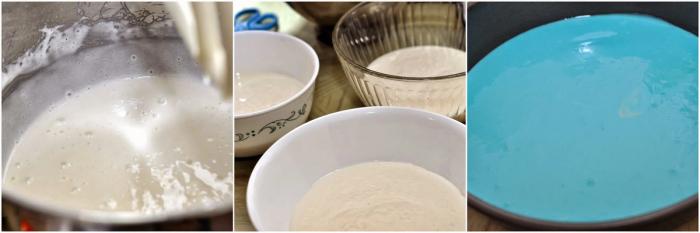
The cake itself is very easy. Six food colors and a batter divided into 6 parts, baked in pans of the same dimensions is all it takes but then perfection demands a bit more :). We made sure that batter divided equally into 6 parts to have cakes of similar thickness. We also cut out 6 parchment paper rounds so that the cakes would be easy to remove as we reused the same baking pans. Its also important that the batter is white cake mix and not yellow else the food colors wont come out as nicely as intended. Also make sure you level the cakes before icing them else the shape will come out to be dome shaped instead of a flat cake. Mine was not perfectly flat but I know where all it needed to be trimmed further to get it perfect the next time.
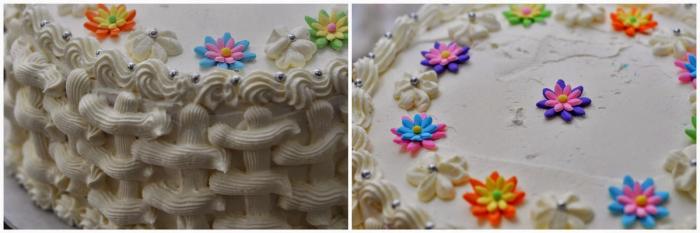
The frosting was a simple affair. Butter and shortening - ratio of butter to shortening as 3:1 instead of 1:1 in the usual recipes. I like the stability that shortening gives to the frosting making it usable at all temperature conditions. But the taste of butter is definitely more desirable and feels healthier than shortening so that was the change I made from previous versions of the frosting. One more note in icing sugar - the amount of icing sugar needed varies heavily on the butter and type of icing sugar. My recommendation is to always start with less and then add more later depending on the stiffness needed. Icing always needs to be more stiff if you are piping designs with it. Sometimes I make softer frosting for the filling and just add more sugar and whip a bit more before I pipe designs with it.
This cake was a definite delight to make and with the right persuasion and occasion I will make it again!
Ingredients
- 2 packs white cake mix
- 6 egg whites
- 2 1/2 cups water
- 2/3 cups vegetable/flavorless oil
- Food color in 6 shades of choice
- 3/4 cup butter (softened)
- 1/4 cup shortening
- 2 tsp vanilla extract
- 4 cups icing sugar (more if needed to make the icing stiffer see note above)
- 2 tablespoons heavy cream
Instructions
- 1
Preheat oven to 350F/180C. Line two 9 inch baking pans with parchment paper and lightly grease the sides of the pan.
- 2
Prepare the cake as per package instructions. The ingredients above are also as per package instructions from Betty Crocker. In case you are using a different brand, use the ingredients/instructions specified in it.
- 3
Divide the batter into 6 equal parts. Add desired food color to each part. The amount of food color will depend on the type of colors used. I used gel colors so just 3-4 drops are sufficient to get the desired shades in the batter.
- 4
Bake each portion of the cake in the preheated oven till cooked and springy to the touch. Once done, move to a wire rack to cool.
- 5
When the cakes are cooling, prepare the frosting by whipping all frosting ingredients in the mixer on medium speed for 1-2 minutes and then on high speed for another 3-4 minutes till the frosting has whipped well and is ready to use.
- 6
Level each cake with a knife to make it a flat disc.

- 7
Start with placing one layer at the bottom and spread some icing on it. Repeat with all layers of cakes, when done cover the cake on all sides with the frosting.
- 8
Once the base icing has been done, decorate the cake as per your liking.

- 9
Slice and enjoy the rainbow on your plate!
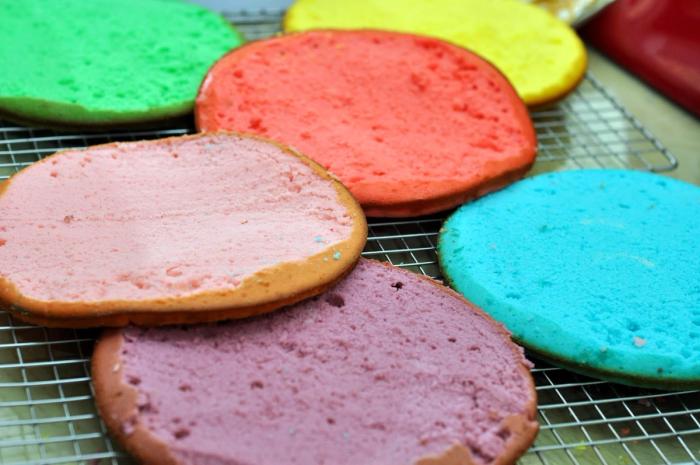
Photo Gallery
Reviews
Sign in to rate this recipe.
No reviews yet — be the first!